Windows 10 WSL 2(Linux 用 Windows サブシステム) + LinuxでのPython環境作成手順 #Python - Qiita
これ見ながら適当に進めてみる。
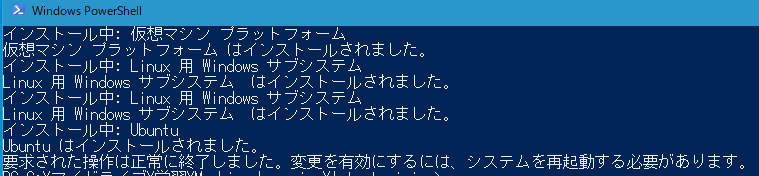
まずPowershell開いて
wsl --install
デフォルトだとUbuntuらしい。
Ubuntu以外にも変えれるが、特にそういう面倒なことはしない。
しばらくすると再起動するように指示されるので、再起動する。
再起動してWindowsにログインすると、以下のような画面。
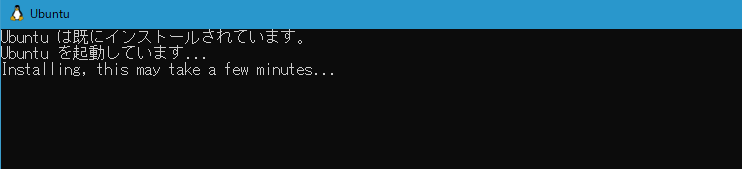
まあ待てばいいらしいので、待つ。

初期ユーザー名の入力を求められる。適当に。
この後パスワードも。
一方で、メモリ上限の設定もやっといたほうがいいらしい。
%userprofile%に.wslconfigというファイルを作り、設定。
実装メモリが32GBなので、その半分にした。
[wsl2]
memory=16GB
swap=0
続いて(何に使うかよくわかってないけど)Windows Terminalをインストール。
Powershellに以下のコマンドを入力。
Powershellが文字化けする場合はフォントを変える。
winget install -e --id Microsoft.WindowsTerminal
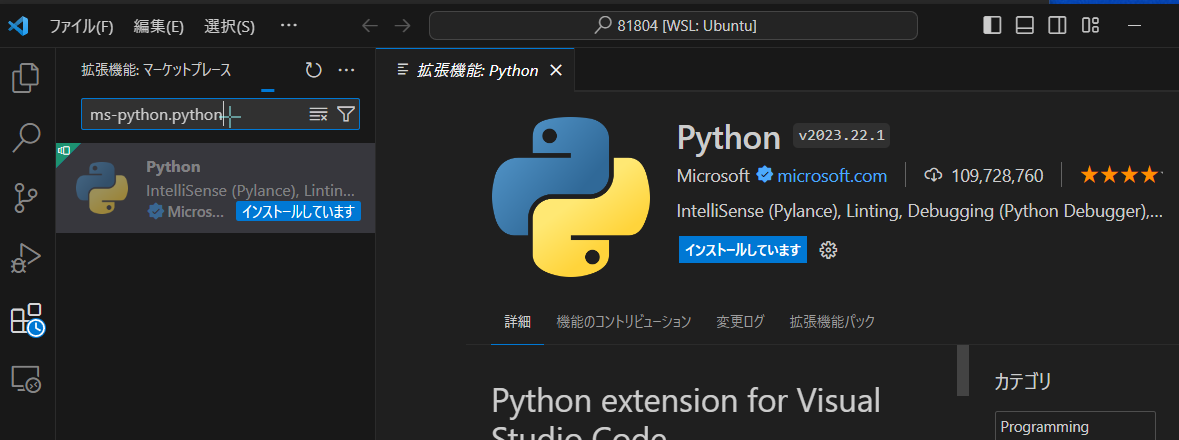
VSCodeを開いて、Remote Explorerという拡張機能を入れる。
いれたらWSLの拡張機能も入れたら?と言われるので言われるがまま入れてみる。
【WSL / WSL2】VSCode×WSLでWindows上にLinux開発環境を構築 #Linux - Qiita
上の記事を参考に、WSLターミナル上で適当にテストフォルダを作ってVS Codeで開いてみる。
mkdir test
cd test
code .
WSL環境のPythonバージョンを確認。
とりあえず python -V で試そうとすると怒られるので、ちゃんとpython3で確認。
python3 -V
3.10.12だったので、まあいいか。
WindowsのVSCodeでWSL2を開き、WSL2のLinux環境に以下の拡張機能をインストールします。(Linux環境ごとにインストールされます。)
この辺は何言ってるか分からんかったけど、たぶん、VS CodeでWSL環境に接続して「ms-python.python」とかの拡張機能を入れればいいっぽい。
Pyenvや前提機能のインストール。
git clone https://github.com/pyenv/pyenv.git ~/.pyenv
sudo apt install libedit-dev -y
sudo apt install libncurses5-dev -y
sudo apt-get install -y make build-essential libssl-dev zlib1g-dev libbz2-dev \
libreadline-dev libsqlite3-dev wget curl llvm libncurses5-dev libncursesw5-dev \
xz-utils tk-dev libffi-dev liblzma-dev python-openssl git
続いて.profleの編集
\\wsl.localhost\Ubuntu\home\
みたいなのをエクスプローラーに入れたらエクスプローラーでメモ帳とかで開ける。
# if running bash
if [ -n "$BASH_VERSION" ]; then
    export PYENV_ROOT="$HOME/.pyenv"
    export PATH="$PYENV_ROOT/bin:$PATH"
    eval "$(pyenv init --path)"
    # include .bashrc if it exists
    if [ -f "$HOME/.bashrc" ]; then
	. "$HOME/.bashrc"
    fi
fi
こんな感じに編集。
.bashrcも編集して、以下を追記。
eval "$(pyenv init -)"
編集したところで一旦wslを停止して再度起動してみる。
PowerShellで以下で停止。
wsl --shutdown
同じく以下で起動。
wsl
順番前後したけど、諸々パッケージの更新。
sudo apt update
sudo apt upgrade -y
sudo apt dist-upgrade -y
sudo apt autoremove -y
Pyenvが動くことを確認。
pyenv install --list
<||

で、もう1度適当に作ったtestフォルダにUbuntu上で移動してVS Codeで開いて、適当なファイルで実行確認。

>||
cd ~\test
code .
print("hello python via wsl2!")
VS Codeで実行しようとすると実行するインタープリタをどれにするか聞かれる。
とりあえず適当に\usr\bin\python3にしたけど、あってるかは分からん。
まあ、普通に動いたのでとりあえず、よし。
で、あとはさらに必要なライブラリを入れていく。
まず、pipを入れる。
sudo apt install python3-pip
入ったら確認。
pip -V
pip 22.0.2 from /usr/lib/python3/dist-packages/pip (python 3.10)
使いそうなモジュールを順次入れていく。
pip install jupyter
pip install numpy
pip install pandas
pip install scikit-learn
pip install pandas_datareader
pip install  yfinance
pip install tensorflow
pip install keras
pip install matplotlib
sudo apt install jupyter-notebook
とりあえず、jupyterが起動することを確認。
jupyter notebook
LAN内の別のマシンからWSLにアクセスしたい。
ってわけで、続いてミラーモードを試す。
WSL を使用したネットワーク アプリケーションへのアクセス | Microsoft Learn
WSL での詳細設定の構成 | Microsoft Learn
値の種類の後に ** が付いているエントリには、Windows バージョン 22H2 以降が必要です。
Windowsのバージョンが22H2以降であることを確認する。
エディション Windows 10 Home
バージョン 22H2
%userprofile%\.wslconfigを開き、networkingMode=mirroredを追記。
[wsl2]
memory=16GB
swap=0
networkingMode=mirrored
wslをシャットダウンして、起動しなおす。
と、こんなメッセージが。
wsl: ミラー化されたネットワーク モードはサポートされていません。NAT ネットワークにフォールバックします
おいおい・・・。
どうもwindows11にしないと使えないっぽい。
なので、おとなしくポートフォワーディングを設定する。
WSL2で起動したサーバーに外部の端末からアクセスする – GUNMA GIS GEEK
ホストOS:18888をゲストOS:8888に転送する。
netsh.exe interface portproxy add v4tov4 listenaddress=<ホストOSのipアドレス> listenport=18888 connectaddress=<wslのipアドレス> connectport=8888
設定確認
netsh.exe interface portproxy show v4tov4
続いてコンフィグを作成。
jupyter notebook --generate-config
vi ~/.jupyter/jupyter_notebook_config.py
c.ServerApp.ipのコメントアウトを解除してIPを指定。
c.ServerApp.ip = '172.19.7.15'
jupyterを起動して、表示されるURLをホストOS上のブラウザで開いてアクセスできることを確認。
jupyter notebook
続いて、LAN内の別のマシンで接続できるか確認。
このとき、URLのIPアドレスおよびポートをポートフォワーディングの設定で使ったlistenaddressとlistenportに書き換えて接続を試行。
できなかったので、FWを設定。
LAN内のIPアドレスからのポート18888の受信を許可するルールをFWに追加。
ここまでやったらようやくLAN内の別のマシンから接続できた。
毎回書き換えるのは面倒なので、URLを置き換えるための拡張機能をブラウザに入れておきたい。
さて、jupyterは使えるようになったので、CUDAだのCuDNNだのを入れていく。
以下を参考に進めていく。
Python3.11 + TF2.12 + GPUの環境を構築した(Windows11 + WSL + VSCode) #Python - Qiita
CUDAは以下でインストール用のコマンドを確認できる。
CUDA Toolkit Archive | NVIDIA Developer
wget https://developer.download.nvidia.com/compute/cuda/repos/wsl-ubuntu/x86_64/cuda-wsl-ubuntu.pin
sudo mv cuda-wsl-ubuntu.pin /etc/apt/preferences.d/cuda-repository-pin-600
wget https://developer.download.nvidia.com/compute/cuda/11.8.0/local_installers/cuda-repo-wsl-ubuntu-11-8-local_11.8.0-1_amd64.deb
sudo dpkg -i cuda-repo-wsl-ubuntu-11-8-local_11.8.0-1_amd64.deb
sudo cp /var/cuda-repo-wsl-ubuntu-11-8-local/cuda-*-keyring.gpg /usr/share/keyrings/
sudo apt-get update
sudo apt-get -y install cuda
インストールが終わったらバージョン確認。
/usr/local/cuda/bin/nvcc --version
続いてCuDNNを入れる。
現行のUbuntuのバージョンをWSLで確認する。
cat /etc/os-release
Ubuntuの22.04らしいので、これに合わせてCuDNNの
- Download cuDNN v8.9.7 (December 5th, 2023), for CUDA 11.x
- Local Installer for Ubuntu22.04 x86_64 (Deb)
を選択。
ダウンロードしたら、ファイルをUbuntu側におく。
~/install というフォルダを作り、そこに置いた。
また、そのフォルダでWSLを開いて以下のようにコマンド。
sudo dpkg -i cudnn-local-repo-ubuntu2204-8.9.7.29_1.0-1_amd64.deb
sudo cp /var/cudnn-local-repo-*/cudnn-local-*-keyring.gpg /usr/share/keyrings/
sudo apt update
sudo apt -y install libcudnn8 libcudnn8-dev libcudnn8-samples
これでインストールできてるっぽいんだけど、続いて確認していく。
cp -r /usr/src/cudnn_samples_v8/ .
cd  ./cudnn_samples_v8/mnistCUDNN
make clean && make
なんかエラー。
FreeImage.h: No such file or directory
まじすか。
足りなりライブラリがあるっぽいので、これでインストールしてみる。
sudo apt -y install libfreeimage3 libfreeimage-dev
んで、もう1回。
make clean && make
とりあえずエラーは起きず。
で、次のコマンドでmnistサンプルを動かす。
./mnistCUDNN
Test passed!
OKそう。
ただ、pythonで確認しようとするとダメ。。。
from tensorflow.python.client import device_lib
device_lib.list_local_devices()
に対して以下の警告
>>> from tensorflow.python.client import device_lib
lib.list_local_devices()2024-01-21 14:53:15.040451: I external/local_tsl/tsl/cuda/cudart_stub.cc:31] Could not find cuda drivers on your machine, GPU will not be used.
2024-01-21 14:53:15.068545: E external/local_xla/xla/stream_executor/cuda/cuda_dnn.cc:9261] Unable to register cuDNN factory: Attempting to register factory for plugin cuDNN when one has already been registered
2024-01-21 14:53:15.068594: E external/local_xla/xla/stream_executor/cuda/cuda_fft.cc:607] Unable to register cuFFT factory: Attempting to register factory for plugin cuFFT when one has already been registered
2024-01-21 14:53:15.069257: E external/local_xla/xla/stream_executor/cuda/cuda_blas.cc:1515] Unable to register cuBLAS factory: Attempting to register factory for plugin cuBLAS when one has already been registered
2024-01-21 14:53:15.073470: I external/local_tsl/tsl/cuda/cudart_stub.cc:31] Could not find cuda drivers on your machine, GPU will not be used.
2024-01-21 14:53:15.073639: I tensorflow/core/platform/cpu_feature_guard.cc:182] This TensorFlow binary is optimized to use available CPU instructions in performance-critical operations.
To enable the following instructions: AVX2 FMA, in other operations, rebuild TensorFlow with the appropriate compiler flags.
2024-01-21 14:53:16.018946: W tensorflow/compiler/tf2tensorrt/utils/py_utils.cc:38] TF-TRT Warning: Could not find TensorRT
>>> device_lib.list_local_devices()
2024-01-21 14:53:20.852905: I external/local_xla/xla/stream_executor/cuda/cuda_executor.cc:887] could not open file to read NUMA node: /sys/bus/pci/devices/0000:01:00.0/numa_node
Your kernel may have been built without NUMA support.
2024-01-21 14:53:20.866457: W tensorflow/core/common_runtime/gpu/gpu_device.cc:2256] Cannot dlopen some GPU libraries. Please make sure the missing libraries mentioned above are installed properly if you would like to use GPU. Follow the guide at https://www.tensorflow.org/install/gpu for how to download and setup the required libraries for your platform.
Skipping registering GPU devices...
[name: "/device:CPU:0"
device_type: "CPU"
memory_limit: 268435456
locality {
}
incarnation: 200145879437482312
xla_global_id: -1
1. NVIDIA GPU Accelerated Computing on WSL 2 — CUDA on WSL 12.3 documentation
ってことで改めて公式の手順を見返すと、どうもCUDAの入れ方をミスってたっぽい。
先に以下のコマンドでGPGキーの削除が必要だったみたい。
sudo apt-key del 7fa2af80
それから以下を再実行。
wget https://developer.download.nvidia.com/compute/cuda/repos/wsl-ubuntu/x86_64/cuda-wsl-ubuntu.pin
sudo mv cuda-wsl-ubuntu.pin /etc/apt/preferences.d/cuda-repository-pin-600
wget https://developer.download.nvidia.com/compute/cuda/11.8.0/local_installers/cuda-repo-wsl-ubuntu-11-8-local_11.8.0-1_amd64.deb
sudo dpkg -i cuda-repo-wsl-ubuntu-11-8-local_11.8.0-1_amd64.deb
sudo cp /var/cuda-repo-wsl-ubuntu-11-8-local/cuda-*-keyring.gpg /usr/share/keyrings/
sudo apt-get update
sudo apt-get -y install cuda
<||

以下も再実行。
>||
sudo dpkg -i cudnn-local-repo-ubuntu2204-8.9.7.29_1.0-1_amd64.deb
sudo cp /var/cudnn-local-repo-*/cudnn-local-*-keyring.gpg /usr/share/keyrings/
sudo apt update
sudo apt -y install libcudnn8 libcudnn8-dev libcudnn8-samples
うーん。。。やっぱダメ。
どうも以下を見る限り、バージョンの組み合わせは結構大事っぽい。
ソースからのビルド | TensorFlow
ってことで、Tensorflowを2.14.0に変更する。
pip uninstall tensorflow
pip uninstall tensorflow-estimator
pip install tensorflow==2.14.0
python3 -c "from tensorflow.python.client import device_lib; print(device_lib.list_local_devices())"
うおおおおおおできたああああああ。
ってことで、この環境でJupyterを動かす。
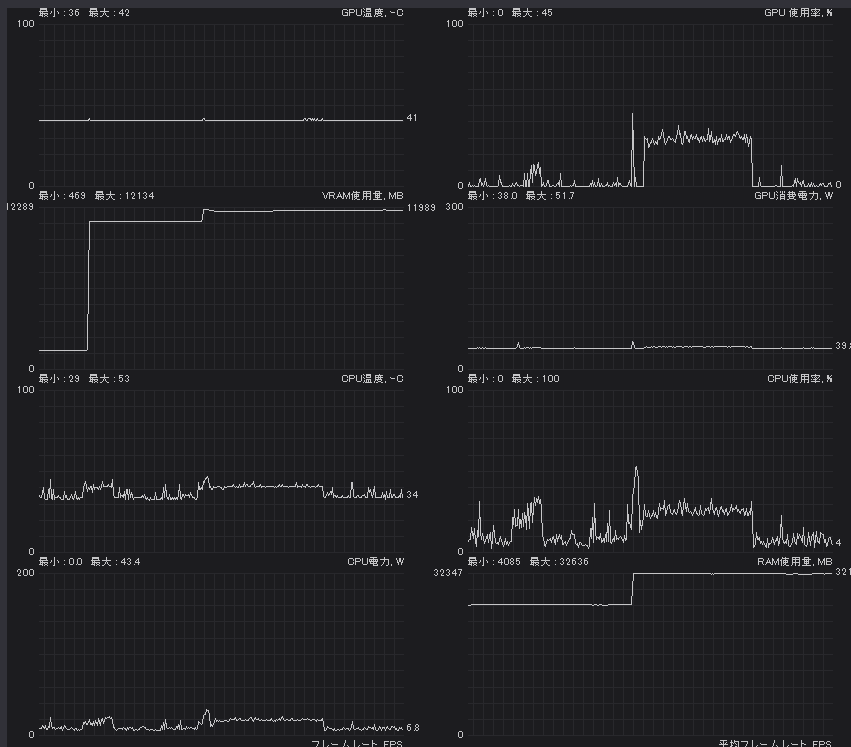
GPU動いてるっぽい。
LSTMでの株価予測を試してみる - 回心誌
上の記事で試したものと同じ学習で動かしてみたら、17ms/stepくらい。
Windows NativeのPythonでCPUで動かした場合だと43ms/stepくらいだったので、まあ半分以下にはなってるね。
ただ、VRAMとRAMの使用量がすごいことになってる。
学習が終わってもほぼ開放してくれてない。
Jupyterを閉じたらさすがに開放される。